How To Incubate Chicken Eggs
As originally published by http://www.backyardpoultrymag.com/how-to-incubate-chicken-eggs/ January 27, 2015
SIS
January 27, 2015
Chicken Coop Chatter©
Learning how to incubate chicken eggs and hatching your own chicks is a fun experience that gives you a sense of accomplishment as those little critters look to you for their care and nurturing. If you are interested in rare breeds, incubating is about the only way you may obtain those chicks at an affordable price.
First and foremost, before you place any eggs in the incubator, test your thermometer and hygrometer http://justfowlingaround.weebly.com/chicken-blog/category/test-hygrometerthermometer, whether it’s new, borrowed or pulled out of winter storage. It is important that these be accurate or there will be a risk of failed hatch.
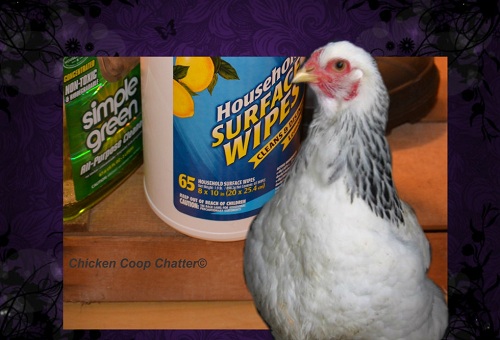
Make sure your incubator is clean and sterilized between hatches and unless it is a brand new incubator, a good cleaning prior to use will be beneficial. We even recommend that you wipe the new incubator down with a disinfectant cloth or sponge.
We recommend an incubator that has an egg turner especially if you work outside the home. Some come equipped with an auto turner, in others that is an option and an additional expense. It is worth the additional investment, since manual turning must be done no less than four or more times a day. This can be tedious because you have to be available for the turning intervals from day 1 to day 18. A busy lifestyle makes manual turning next to impossible.
Incubation By The Numbers The incubation period for chickens is 21 days.
Temp (F)¹: 100 degrees F
Humidity (F)²: 30-40% first 18 days (no higher)
Humidity: 55-65% last 3 days (no higher)
Do not turn after day 18.
Monitor the incubator throughout the incubation period to make certain the temperature and humidity are kept at optimum. On day 18, turn off the egg turner and remove it. Lay the eggs on their side (horizontal). Do not open the incubator or disturb the eggs from days 18 to 21. At the time of hatch, the vents should be all open or adjusted to maintain proper temperature and humidity. Do not remove the chicks until they are mostly dry. Each time you open the incubator, you are losing heat and humidity.
From the time of pipping to the time of actual hatching, it may take several hours. Hatching is hard work for a chick, so they rest and even sleep between efforts. Allow the chicks to dry in the incubator before placing them in the brooder and only remove if there is over crowding or the hatched chicks are disturbing unhatched eggs.
In the meantime prepare your brooder, so it is warm and ready to receive the hatched chicks. http://justfowlingaround.weebly.com/chicken-blog/category/incubating-and-brooders
For rare and heritage fertile hatching eggs, please visit our breed profile page: http://justfowlingaround.weebly.com/breed-profiles
We are always happy to walk you through and provide emotional support during the incubation period. Feel free to visit us on our Facebook page https://www.facebook.com/pages/Just-Fowling-Around/365743116845352 if you have any questions through the process.
Chicken Coop Chatter© All Rights Reserved 2011-2016
As originally published by http://www.backyardpoultrymag.com/how-to-incubate-chicken-eggs/ January 27, 2015
SIS
January 27, 2015
Chicken Coop Chatter©
Learning how to incubate chicken eggs and hatching your own chicks is a fun experience that gives you a sense of accomplishment as those little critters look to you for their care and nurturing. If you are interested in rare breeds, incubating is about the only way you may obtain those chicks at an affordable price.
First and foremost, before you place any eggs in the incubator, test your thermometer and hygrometer http://justfowlingaround.weebly.com/chicken-blog/category/test-hygrometerthermometer, whether it’s new, borrowed or pulled out of winter storage. It is important that these be accurate or there will be a risk of failed hatch.
Make sure your incubator is clean and sterilized between hatches and unless it is a brand new incubator, a good cleaning prior to use will be beneficial. We even recommend that you wipe the new incubator down with a disinfectant cloth or sponge.
We recommend an incubator that has an egg turner especially if you work outside the home. Some come equipped with an auto turner, in others that is an option and an additional expense. It is worth the additional investment, since manual turning must be done no less than four or more times a day. This can be tedious because you have to be available for the turning intervals from day 1 to day 18. A busy lifestyle makes manual turning next to impossible.
Incubation By The Numbers The incubation period for chickens is 21 days.
Temp (F)¹: 100 degrees F
Humidity (F)²: 30-40% first 18 days (no higher)
Humidity: 55-65% last 3 days (no higher)
Do not turn after day 18.
Monitor the incubator throughout the incubation period to make certain the temperature and humidity are kept at optimum. On day 18, turn off the egg turner and remove it. Lay the eggs on their side (horizontal). Do not open the incubator or disturb the eggs from days 18 to 21. At the time of hatch, the vents should be all open or adjusted to maintain proper temperature and humidity. Do not remove the chicks until they are mostly dry. Each time you open the incubator, you are losing heat and humidity.
From the time of pipping to the time of actual hatching, it may take several hours. Hatching is hard work for a chick, so they rest and even sleep between efforts. Allow the chicks to dry in the incubator before placing them in the brooder and only remove if there is over crowding or the hatched chicks are disturbing unhatched eggs.
In the meantime prepare your brooder, so it is warm and ready to receive the hatched chicks. http://justfowlingaround.weebly.com/chicken-blog/category/incubating-and-brooders
For rare and heritage fertile hatching eggs, please visit our breed profile page: http://justfowlingaround.weebly.com/breed-profiles
We are always happy to walk you through and provide emotional support during the incubation period. Feel free to visit us on our Facebook page https://www.facebook.com/pages/Just-Fowling-Around/365743116845352 if you have any questions through the process.
Chicken Coop Chatter© All Rights Reserved 2011-2016
 RSS Feed